

How Long Do I Cook A Turkey In The Bag
We were going to give you just 20 simple turkey-cooking tips, but we realized there are far too many turkey questions, so instead we created this comprehensive "Handbook for The Perfect Turkey."
It's still very simple and easy to follow, but we think it addresses more of the complexities of why turkeys come out properly cooked, overcooked and unfortunately at times, undercooked (itself a health hazard).
If you follow our advice, you'll end up with the best turkey you've ever eaten, no matter whose basic recipe you're following.

Preface: Safety Tips Before Cooking
- Rule #1: Wash the Bird.
Rinse all poultry and poultry pieces under cool running water, rubbing all surfaces inside and out, to wash away bacteria. - Rule #2: Avoid Cross-Contamination.
Any surface that comes in contact with raw poultry—knives, cutting boards, counter tops, dish towels, sink, etc.—must be washed with hot soapy water before using again. Bacteria transfers easily from one surface to the next and can result in illness. - Rule #3: Keep hot foods hot and cold foods cold.
Both cooked and uncooked food should be stored properly and never left at room temperature for extended periods. Bacteria multiply between 40 and 140 degrees F., with the quickest growth happening between 70 and 100 degrees (right around room temperature)
Buying a Turkey
Q: What size turkey should I buy?
A: For a whole turkey, allow about one pound per person, which includes a moderate amount for leftovers. If you like a lot of leftovers, allow up to 1-1/2 pounds per person. Turkeys range in size from 4 pounds, which are baby turkeys about the size of a chicken, to whoppers up to 25 pounds. Most markets stock 8 to 20 pound turkeys, so if you plan on a small or very large bird, you may want to order it in advance.
Turkey Tip: Make sure your roasting pan, oven and refrigerator can accommodate the size turkey you buy. There's nothing worse on Thanksgiving than realizing the bird won't fit in the oven or the pan.
Q: Is it better to buy one large turkey or two small ones?
A: If the visual image of a huge, whole bird on a platter is important to you, then go with a large turkey (if you can lift it). But today's chefs have found that two smaller birds not only take less time to roast, but they stay moister too. In many cases, one of the birds is served on Thanksgiving and the remaining one is stored for leftovers, again staying moister and taking up less room in the refrigerator than the leftover carcass of a large bird.
Q: Should I buy fresh or frozen?
A: That depends on your tastes and budget. A fresh, commercially raised turkey is easy since it does not require thawing. Many people feel it tastes better than frozen, but USDA rules allow for poultry to be labeled fresh even if it has been frozen to some extent. Birds sold as frozen can taste just fine, provided they have not been frozen so long that the quality begins to deteriorate. Fresh, locally raised turkeys are often raised on special diets that are claimed to make them tastier, and are available from the turkey ranch directly or by advance order to certain specialty and natural foods markets. These types or turkeys really are fresh and not frozen in any step of the process, and consequently cost more.
Q: What about turkeys that have been injected with fats and seasonings?
A: Some brands of turkey inject the flesh with fatty substances to keep the breast meat moist. However, many people prefer natural birds that are free of these added fats, salts and chemicals. Before buying a bird, be sure to read the label.
Q: What about turkey parts and frozen stuffed turkeys?
A: For a small meal, or if you prefer only one type of meat, you may want to consider buying turkey parts, such as the whole breast, half breast, legs or thighs. Other products now available include boneless breast roasts, sliced turkey breast cutlets and boneless turkeys. While frozen pre-stuffed turkeys are convenient in that they go from the freezer directly to the oven (no thawing), you take your chance on whether you'll like the stuffing and seasonings they use and on overall taste and quality.
Storing an Uncooked Turkey
Rule #4: Store turkeys at 40 degrees F. or below. Store turkeys in the coldest part of your refrigerator, in the back on a lower shelf.
Q: How long can a whole turkey be kept frozen?
A: A whole frozen turkey in its original packaging may be stored at 0 degrees F. for up to one year before the quality begins to deteriorate. Properly thawed frozen turkeys can be refrigerated in their original packaging from 1 to 5 days before cooking.
Q: How long can a fresh turkey be kept refrigerated?
A: A locally raised fresh turkey will last only 1-2 days refrigerated at 40 degrees F. or below. Commercially raised fresh turkeys in their unopened packaging may last longer and should be marked with a "Use By" date, which is your best indicator (but in our experience that date stretches the quality and freshness a day too long); they may usually be kept as long as 3-4 days under refrigeration.
Thawing a Frozen Turkey
Thawing Methods:
- Recommended: Thawing in the Refrigerator
Leave the bird in its original wrapping and place it on a tray in the refrigerator. Allow 5 hours per pound or 3-4 days for a 14-19 pound turkey to defrost. - "Quick" Thawing:
Place turkey in its original wrapping in sink and cover with COLD water. Change the water every 1/2 hour to maintain the temperature. Allow 1/2 hour per pound to defrost the turkey. Most turkeys will take from 5 to 10 hours to thaw. - Microwave Thawing: NOT RECOMMENDED
Microwave ovens do not heat evenly, and they also heat quicker along the bone. Microwave thawing of a turkey is generally not recommended.
Turkey Thawing Time in the Refrigerator (40 degrees F):
Approximately 24 hours per 5 pounds
| Whole Turkey Weight | Thawing Time |
| 8 to 12 lbs | 1 to 2 days |
| 12 to 16 lbs | 2 to 3 days |
| 16 to 20 lbs | 3 to 4 days |
| 20 to 24 lbs | 4 to 5 days |
Turkey Thawing Time in Cold Water: Approximately 30 minutes per pound.
Change water every 1/2 hour.
| Whole Turkey Weight | Thawing Time |
| 8 to 12 lbs | 4 to 6 hours |
| 12 to 16 lbs | 6 to 8 hours |
| 16 to 20 lbs | 8 to 10 hours |
| 20 to 24 lbs | 10 to 12 hours |
Stuffing (or Not Stuffing) a Turkey
Rule #7: Never stuff a bird until you are ready to roast it.
Pre-stuffing runs the risk of food poisoning, and of all the parts of the turkey, stuffing is the most easily contaminated. Always cook it to 165 degrees F. even when you reheat it.
Q: Is it best to cook the stuffing inside the bird, or separately in a baking dish?
A: Many chefs today recommend cooking the stuffing in a separate dish instead of in the cavity. When placed inside the bird, stuffing cooks unevenly and may not be completely cooked through, offering a potential health hazard. Also, an unstuffed bird requires less cooking time, leaving the breast meat moister. Baked separately, a stuffing should initially be cooked covered for 45 minutes, and if the interior is too dry, simply moisten with some of the pan juices. Then uncover for a final 20-30 minutes of cooking to develop a wonderful crackly top.
Q: If I do want to stuff the bird, what's the best way to do it?
A: In the traditional method, gently place the stuffing in the body and neck cavities but be sure to pack them loosely. As it cooks, the stuffing will expand. You also want the stuffing to cook through completely, and hard packed stuffing may not.
A newer method places the stuffing between the meat and the skin. Loosen the skin over the breast, legs and thighs and gently insert the stuffing. This results in a very moist bird and ensures the stuffing to cook through. If there is any leftover stuffing, bake it separately in a baking dish.
Turkey Tip: To save time, make your stuffing in advance and freeze it, then thaw overnight in the refrigerator. If you plan to use the gizzards, then remove them from the bird just before roasting and cook and stir them into your pre-made stuffing.
Q: How much stuffing do I need?
A: If you just want to stuff the cavity, then allow 1/2 cup stuffing per pound of turkey. If you want extra stuffing and plan to bake it separately, then allow 1 cup of stuffing per pound, and even more if it's a perennial favorite. While stuffings can be made from all different types of breads, grains and rice, here's a handy rule-of-thumb to follow: plan on using a single slice of bread to make 1/2 cup of stuffing when mixed with added seasonings and aromatics.
Q: Do I need to close up the cavity after it has been stuffed?
A: Some cooks like to skewer or sew the cavity shut after stuffing but it's not at all necessary and is entirely up to the cook
Preparing the Turkey for Roasting
Rule #8: Follow the safe-handling tips
Rinse the turkey in cool water, avoid cross-contamination by washing all surfaces that come in contact with raw turkey in hot soapy water before using on any other foods.
Turkey Tip: Remove the whole turkey from the refrigerator about an hour before cooking (no more than that) to bring the bird to room temperature. Make use of this time to cook the giblets or neck for the stuffing, stock or gravy.
Pre-Roasting Steps
- Step 1: Preheat the oven 325 degrees F., or as specified by your recipe. Move the oven rack to the lowest rung.
- Step 2: Remove the Giblets
Just before cooking, remove the giblets from their bag (stuck in the neck cavity) and the neckbone from the body cavity and rinse the giblet pieces (heart, gizzard, liver) and neckbone under cool running water to remove bacteria. Pat dry with paper towels and set aside for use in the stuffing or stock. (Note: If you are not quite ready to cook the bird within an hour after removing it from the refrigerator, return the turkey to the refrigerator until an hour before ready to roast.) - Step 3: Rinse & Season
Rinse the whole bird, including the body and neck cavities under cool running water, rubbing your hands over the surface to help remove any bacteria. Pull out any lumps of fat from the cavity and discard. Pat the bird dry with paper towels. Salt and pepper the inside and outside of the bird, and rub in any seasonings per your recipe. - Step 4: Stuffing & Trussing
As discussed below, many chefs today prefer not to stuff or truss the bird. However, if you prefer to stuff and/or truss the bird, now is the time to do it. Follow the instructions for Stuffing the Bird, or if not stuffing, proceed onto Roasting the Turkey.
Q: Do I need to truss the bird's legs, or can I just roast it without all that extra effort?
A: Trussing, tying the bird into a more compact shape with twine or string, is an old-fashioned method used mainly for presentation, so that the legs and wings would be held closer to the body and hence "more attractive." Today, many chefs recommend not trussing the legs and simply folding the wing tips under the body instead.
Why?
Because trussed legs take longer to cook at the joint than untrussed legs, and hence the breast also ends up cooking longer and becoming more dry. Many turkeys today come with metal or oven-proof plastic clamps known as "hock locks" or "leg trusses" which, when the legs are placed under them, do the same thing as trussing with string. The choice of trussing is up to the cook, but for a moister bird that takes less time to cook, we prefer not to truss.
Turkey Tip: The larger the bird, the heavier it is to lift in and out of the pan, especially if stuffed. You can by a commercial turkey lifter, which loops over both ends of the turkey and has handles for easy lifting. Or, pull off two 3- to 4-foot long pieces of foil (depending on the size of the bird. Fold each foil piece over lengthwise to form a 1-inch wide long strip.
Before placing the turkey in the pan, lay one strip across below the legs and one below the wings. Place the turkey on top, let the ends rest over the sides of the pan. Bring the lengths up over the top of the bird as handles and use them to lift the bird out of the pan.
Roasting a Turkey
Earlier cookbooks recommended longer cooking times, but with today's turkeys bred with more white meat, such times will result in dry, overcooked birds. Follow our tips for roasting and checking the temperature to achieve a perfectly cooked bird.
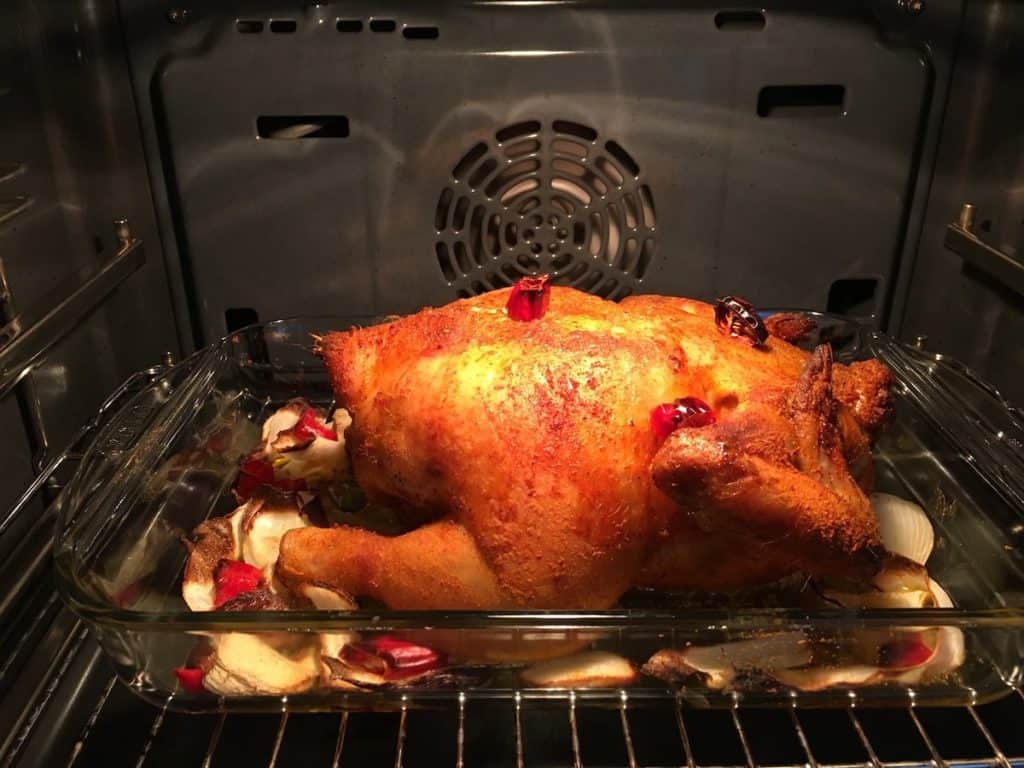
- Step 1: Place the bird breast-side up on an oiled flat or v-shaped rack in a 12×17 inch roasting pan, or as recommended by your recipe.Turkey Tip: Beware of aluminum roasting pans! Most of these pans are not sturdy enough to carry a 12 pound or more turkey. They can buckle and cave in, and have been known to cause injuries by collapsing under the weight. Make sure your pan is sturdy enough to handle the bird safely.
- Step 2: If using an oven-safe meat thermometer, insert it in the inner thigh near the breast, but without touching the bone. If using an instant-read thermometer, wait until the turkey is nearly cooked before testing. Don't rely on plastic pop-up timers—they aren't very accurate.
- Step 3: Coat the skin with softened or melted butter or oil and baste the bird every 30 minutes, or according to the recipe. Or follow our suggestions below for keeping the breast meat moist.
Q: How do I keep the breast meat moist when cooking?
A: The best way is to cook the turkey at a low temperature like 325 degrees F. And to remove it from the oven when just done. While some people feel basting is unnecessary since it doesn't permeate the skin, others recommend basting and these techniques for keeping the bird moist:
- Method #1
Soak a double layer of cheesecloth in melted butter or canola oil. Drape the cloth over the turkey while it roasts. The skin will be a rich, golden brown; if you refer a crispy skin, remove the cheesecloth 30 minutes before taking the bird from the oven. - Method #2
Baste the bird with melted butter and/or pan juices every 30-40 minutes while cooking. Or use a nonstick spray. (NOTE: Allow extra cooking time whenever you open and close the oven.) - Method #3
Loosen the skin of the bird and press the stuffing between the skin and the meat; the surface will look lumpy, but the breast meat will be remarkably moist. - Method #4
Brine the turkey overnight, refrigerated, in 2 cups kosher salt dissolved in 2 gallons water. The meat stays moister but it also takes less time to cook, so check the internal temperature earlier than usual.
Turkey Tip: To prevent the skin from overbrowning, shield the breast with a tented piece of foil, then remove it the last 45-60 minutes of cooking to allow the skin to brown.
- Step 4: Set your timer—you'll want to start checking your bird abut 3/4's of the way into its estimated cooking time, based on the recipe or our cooking chart. When the timer goes off, check the bird using the thermometer. If the bird is done, remove it from the oven and set it sit 20-30 minutes before carving so the flesh reabsorbs the meat juices.
Turkey Tip: While the turkey is resting before carving, take this time to make the gravy. By the time the gravy is done, the turkey should be just about ready to serve.
- Step 5: Remove all of the stuffing from the cavities, if you have stuffed the bird. For health reasons, never store stuffing in the bird.
- Step 6: Carve the bird and give thanks—it's time to serve your Thanksgiving meal!
How to Tell When the Turkey Is Done
Rule #9: Always use a meat thermometer to check for doneness.
See our section on Using a Meat Thermometer.
Q: My turkey comes with a plastic pop-up timer. Can't I use that instead?
A: You can, but many cooks have found them unreliable, usually resulting in overcooked turkey. The best method is to use an accurate meat thermometer, whether it be the oven-safe or instant read variety.
Turkey Tip: To test the accuracy of your instant read thermometer, insert the tip about 2 inches deep into boiling water. At sea level it should register 212 degrees F. If it does not, replace it; or if it has a calibration device, reset it for accuracy.
Q: How accurate are "recommended cooking times"?
A: None of us want an undercooked turkey—or an overcooked one! with so many variables, it's best to check your turkey with a meat thermometer before you estimate the bird to be done. Don't ever serve an undercooked bird, but in some instances, we've found the USDA recommended cooking times to be longer than necessary, resulting in an overcooked bird, so start checking your bird about 3/4th of the way through the total recommended cooking time.
Q: How can I tell when the turkey is done?
A: There are several ways to determine if the turkey is cooked through. For safety and doneness the internal temperature, as registered on a meat thermometer, must reach a minimum of165 degrees, though most cooks will prefer up to 180 degrees F. in the thigh.
The center of the stuffing should reach 165 degrees F in the cavity, and the center of the breast is doneat 165 to 170 degrees. You can also prick the leg joint with a fork, and if the juices run just slightly pink or clear, the turkey is done.
USDA Timetable for Turkey Roasted at 325 degrees F.
Note: These times are approximate and should always be used in conjunction with a properly placed thermometer. Be sure to check the thermometer about 3/4th of the way through the time indicated so as not to overcook.
| Unstuffed Weight | Roasting Time |
| 8 to 12 lbs | 2-3/4 to 3 hours |
| 12 to 14 lbs | 3 to 3-3/4 hours |
| 14 to 18 lbs | 3-3/4 to 4-1/4 hours |
| 18 to 20 lbs | 4-1/4 to 4-1/2 hours |
| 20 to 24 lbs | 4-1/2 to 5 hours |
| Stuffed Weight | Roasting Time |
| 8 to 12 lbs | 3 to 3-1/2 hours |
| 12 to 14 lbs | 3-1/2 to 4 hours |
| 14 to 18 lbs | 4 to 4-1/4 hours |
| 18 to 20 lbs | 4-1/4 to 4-3/4 hours |
| 20 to 24 lbs | 4-3/4 to 5-3/4 hours |
Other Cooking Methods
Cooking Turkey with Foil Tent Method
The traditional method of roasting turkey uses a foil tent of heavy duty aluminum foil to keep the turkey moist. Slow oven roasting ensures a roasted flavor.
- Appearance—even golden brown and crisp exterior.
- Advantage—often preferred for carving at the table.
How To:
Preheat oven to 325 degrees F. Line a roasting pan, at least 2 inches deep, with heavy duty aluminum foil.
Remove neck and giblets from both cavities of defrosted turkey. Rinse turkey, pat dry and brush with vegetable oil.
Insert meat thermometer into the inner thigh for the whole turkey or into the thickest part of the breast for the turkey breast. Place turkey, breast side up, in foil-lined roasting pan.
Make a foil tent by tearing off a sheet of heavy-duty aluminum foil. Crease foil crosswise through the center. Place over turkey, leaving 1 inch between the top of turkey and foil tent for heat circulation. Crimp foil onto long sides of pan to hold in place.
Roast until a meat thermometer reads 180 degrees to 185 degrees F for a whole turkey, or 170 degrees to 175 degrees F for turkey breast. For stuffed turkey, add 30 minutes to roasting time.
To brown turkey, remove foil tent after the first 1 hour of roasting time. The approximate roasting times are 2-1/2 to 3 hours for 8 to 12 lb. turkey; 3 to 3-1/2 hours for 12 to 16 lb. turkey; 3-1/2 to 4 hours for 16 to 20 lb. turkey; 4 to 5 hours for 20 to 24 lb. turkey.
For easy slicing, cover turkey with foil and let stand 15 minutes after removing from oven.
Preparing Turkey in Microwave
This method is recommended only for small whole turkeys and turkey breasts. A oven bag is used to promote even cooking.
- Appearance—lightly browned with the use of a browning and seasoning sauce. Skin is not "crisp" but resembles microwave-cooked chicken.
- Advantage—the fastest method for cooking turkeys weighing 8 to 12 pounds.
How To:
Shake 1 tablespoon flour in an oven bag. Use a large-size bag (14″ x 20″) for 8 to 12-pound turkey and 4 to 7-pound turkey breast. Leave flour in the bag. Place bag in 2-inch-deep microwave-safe baking dish.
Remove neck and giblets from both cavities of defrosted turkey. Rinse turkey, pat dry and brush with a combination of 1 tablespoon vegetable oil and 1/4 teaspoon browning and seasoning sauce. Sprinkle with salt, pepper, and paprika for additional color, if desired.
Do not stuff the turkey.
Slice 1 onion and 2 stalks celery; place in oven bag. Place turkey, breast side up, in oven bag on top of vegetables. Close oven bag with nylon tie; cut six 1/2-inch slits on top of oven bag.
Microwave on MEDIUM (50% power) for 7 to 9 minutes per pound rotating dish every 15 minutes. Not recommended for turkey over 12 pounds
Use an instant-read thermometer after cooking. Turkey is done when the thermometer reads 180 degrees to 185 degrees F for whole turkey or 170 degrees to 175 degrees F for turkey breast.
Insert thermometer through a slit in oven bag into inner thigh for the whole turkey or into the thickest part of the breast for turkey breast.
For easy slicing, let stand 10 minutes after removing from the microwave oven. To open, carefully cut or slit the top of oven bag. NOTE Microwave directions were tested in 600 to 700-watt microwaves. Higher or lower wattage ovens may need adjustment in cooking times.
Cooking Turkey with Barbecue Method
This method requires a covered barbecue grill and heavy-duty aluminum foil.
- Appearance—even golden brown and "crisp" exterior. The meat just under the skin may have a pink color, typical of charcoal-cooked turkey.
- Advantage—a very easy method for cooking turkey outdoors.
How To:
Line a charcoal grill with heavy-duty aluminum foil to keep after-the-meal cleanup to a minimum. (Do not line a gas grill.) Open all vents and punch holes through foil at grill vent openings, allowing for air circulation.
Arrange charcoal in a pyramid shape at bottom of the grill, and ignite. When coals are hot, carefully place a large barbecue drip pan in the center of the grill. Arrange coals on either side.
(To make foil drip pan: Stack 2 sheets of heavy-duty aluminum foil 6 inches longer and wider than food to be cooked. Fold in all edges 1-1/2 inches. Fold edges upright, forming 1-1/2-inch sides. Press corners against sides.)
Remove neck and giblets from both cavities of defrosted turkey. Rinse turkey, pat dry and brush with vegetable oil.
Do not stuff the turkey.
Insert meat thermometer into the inner thigh for the whole turkey or into the thickest part of the breast for the turkey breast. Grease grill rack with vegetable oil. Place turkey, breast side up, on grill rack above drip pan.
Cook in covered grill over medium, indirect heat until a meat thermometer reads 180 degrees to 185 degrees F for whole turkey or 170 degrees to 175 degrees F for turkey breast.
For a charcoal grill, add additional charcoal every 45 to 50 minutes to maintain medium heat. The approximate roasting times are 2 to 3 hours for 8 to 12 lb. turkey; 3 to 4 hours for 12 to 16 lb. turkey. Not recommended for 16 to 24-pound turkey.
For easy slicing, cover turkey with foil and let stand 15 minutes after removing from grill.
Cooking Turkey with Foil Wrapped Method
A real timesaver, this method of cooking turkey requires a high oven temperature of 450 degrees F and heavy-duty aluminum foil.
- Appearance—light golden brown with some variation in color. Skin is not as "crisp" as traditional foil tent roasted turkey.
- Advantage—often preferred for faster roasting time.
How To:
Preheat oven to 450 degrees F. Remove neck and giblets from both cavities of defrosted turkey. Rinse turkey, pat dry and brush with vegetable oil.
Tear off a sheet of 18-inch-wide heavy-duty aluminum foil 2-1/2 times longer than the turkey. Place turkey, breast side up, in center of a foil sheet.
Bring long sides of the foil over turkey; close loosely by overlapping the ends. Turn up short sides of foil to hold in juices. Do not seal airtight. Place foil-wrapped turkey in roasting pan at least 2 inches deep. Insert meat thermometer into the inner thigh for the whole turkey or into the thickest part of the breast for the turkey breast.
Roast until a meat thermometer reads 180 degrees to 185 degrees F for whole turkey or 170 degrees to 175 degrees F for turkey breast.
For stuffed turkey, add 30 minutes to roasting time. To brown turkey, open and turn back foil 30 minutes before roasting is finished.
The approximate roasting times are 1-1/2 to 2-1/4 hours for 8 to 12 lb. turkey; 2-1/4 to 2-3/4 hours for 12 to 16 lb. turkey; 2-3/4 to 3-1/4 hours for 16 to 20 lb. turkey; 3-1/4 to 3-3/4 hours for 20 to 24 lb. turkey.
For easy slicing, cover turkey with foil and let stand 15 minutes after removing from oven.
Making the Gravy
- Rule #10: Make the gravy in the same pan you used to roast the turkey.
- Rule #11: All gravies require a thickener and one or more liquids.
Thickeners: flour or cornstarch
Liquids: the pan juices, chicken broth, water, or stock and sometimes a dash of white wine, milk, sherry, etc. - Rule #12: Determine your measurements.
The standard ratio is 1 tablespoon of fat from the drippings, plus 1 tablespoon of flour (or 1/2 tablespoon of cornstarch), per cup of liquid. - Rule #13: Cook the flour all the way through.
Undercooked flour gives off a raw taste. It should bubble in the fat and start to turn brown.
Making the Basic Gravy
- Step 1:
Remove the turkey and rack from the pan. Pour off the liquids from the pan into a Pyrex or heatproof measuring cup. Let settle until the fat rises to the top, then skim off as much as possible, reserving the desired amount for the gravy. - Step 2:
Heat the roasting pan over a burner (or 2 if it's really large). Stir in the flour over medium heat cook through until it bubbles and browns slightly. Remove the pan from the heat and stir in the reserved juices and broth or other liquids. Reheat the pan over the burner(s) and let the mixture come to a slow boil; season with salt and pepper and boil for 1 minute until the gravy thickens. - Step 3:
If the gravy cools before serving it may become too thick and should be reheated with additional liquid.
Turkey Tip: Additions to gravy may include cooked, chopped giblets, finely diced tomato bits, mushrooms, and parsley.
Carving the Turkey
- Rule #14: Make sure your carving knife is sharp.
Sharpen with a steel or electric sharpener, whetstone or other sharpening gadget. You are more likely to cut yourself using a dull knife than a sharp one.
Turkey Tip: Use a long-two pronged carving fork to hold the bird steady as you cut.
Basic Carving steps
- Step 1: Removing the thigh, drumstick & wings
- hold the drumstick and pull it away from the body;
- slice through the skin to the joint where the leg meets the backbone
- cut through the joint, pressing the leg away from the body with the side of the knife
- when the leg is freed, cut through the drumstick-thigh joint
- if desired, cut these pieces into slices, running the knife parallel to the bone.
- to cut the wings off, follow the same type of procedures, always cutting through the joint
- Step 2: Carving the breast
- make a long slit across the base of the breast, parallel to the wing, all the way to the rib cage
- cut thin slices vertically across the beast; if done properly, the horizontal cut you made at the base will allow these slices to fall off gently as you progress through the breast.
Storing Leftovers & Food Safety After Cooking
Rule #15: Never let the Thanksgiving meal linger.
Refrigerate the cooked turkey and other parts of the meal within 2 hours after cooking. Never store the stuffing and the turkey together.
Turkey Tip: Before serving the turkey, set out all your storage containers, foil, zipper bags, etc., so they are ready for filling with leftovers as soon as the meal is over. You'll not only store the foods more safely by minimizing their exposure out of the refrigerator, but you can more easily enlist extra pairs of hands to help out in the kitchen.
Use refrigerated turkey and stuffing within 3 days of cooking.
Reheat leftover stuffing to at least 165 degrees F. Bring leftover gravy to a rolling boil before serving. Cool foods rapidly by storing in shallow, small containers.
Turkey Tip: To keep the cut surface of the turkey breast from drying out, press a piece of plastic wrap or a damp paper towel next to it before covering and refrigerating
How Long Do I Cook A Turkey In The Bag
Source: https://foodwine.com/turkey-handbook/
Posted by: harrwalwascalith.blogspot.com
0 Response to "How Long Do I Cook A Turkey In The Bag"
Post a Comment